Please scroll down to your Year group and choose a task - it should last you the amount of lessons stated...PLEASE DON'T RUSH!
These have all been designed to compliment your work at school and for easy working at home with minimal resources needed. Use Satchel as well to check if there are alternative tasks set by your teacher...
YEAR 7
Self Portraits
|
oThis is the basic guide to getting the proprtions right - a circle with an extended bottom half (your chin), then eyes half way, nose half way below that and mouth half way below that again!
|
This is me applying the knowledge of the proportions to getting something looking a lot more like me - I used a photo on my phone to draw from...you could use a mirror or a photo if you like.
|
|
|
|
This final video shows you how to add tone (shading with a pencil to show shadows and 3-D shapes). You have to really look for it and remember we do not have bright white faces as all of our skin tones are darker than that! If it helps, you could turn your photo into a black and white one on your phone or tablet...this might be easier?
TRAINER (1-2 lessons)
Produce a tonal drawing of your trainer - this is a 1-2 lesson piece of work...take your time!
TRAINER DEVELOPMENT
Year 8
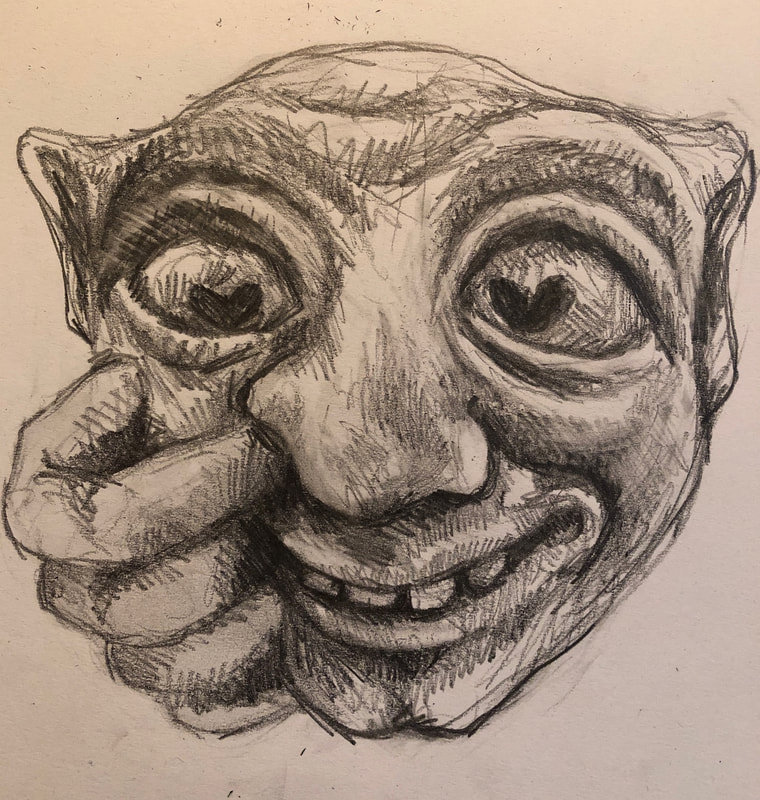
Gargoyles
My opinion is that drawings do not have to be perfect...far from it! I like mine to look alive (if I want an exact copy of something I'll take a photo!!) and have plenty of lines still showing in the shading...go one, be brave! Don't be afraid to use a rubber though to get the shapes right and your first lines should ALWAYS be light lines - see, I don't get it right first time and use a rubber too!
Drawing Task #1 - observed from a photo using pencil
|
Watch this timelapse video of Mrs Thompson drawing her gargoyle - she does what you should be doing:
|
|
Watch this video to see Mrs Thompson using the scribble technique to draw a gargoyle - notice how you can get darker tones the more you overlap your scribbles in differing directions...
#CHALLENGE - try to not let your pen leave the paper and make your drawing one long continuous line! |
This short clip shows how you can build up layers of tone using a very cheap and easy art material that lots of you will have at home - yes, COFFEE!! I used a smaller brush for the detail - you could use a cotton bud though...
#TOP TIP - if you leave the first layer of coffee to dry before adding your second layer, you get darker tones to show better shadows |
2 videos showing you my "movie monster" drawing using felt tip pen and water to blend it in - sketch first in pencil and add sharpie pen detail after when it is dry.
|
|
|
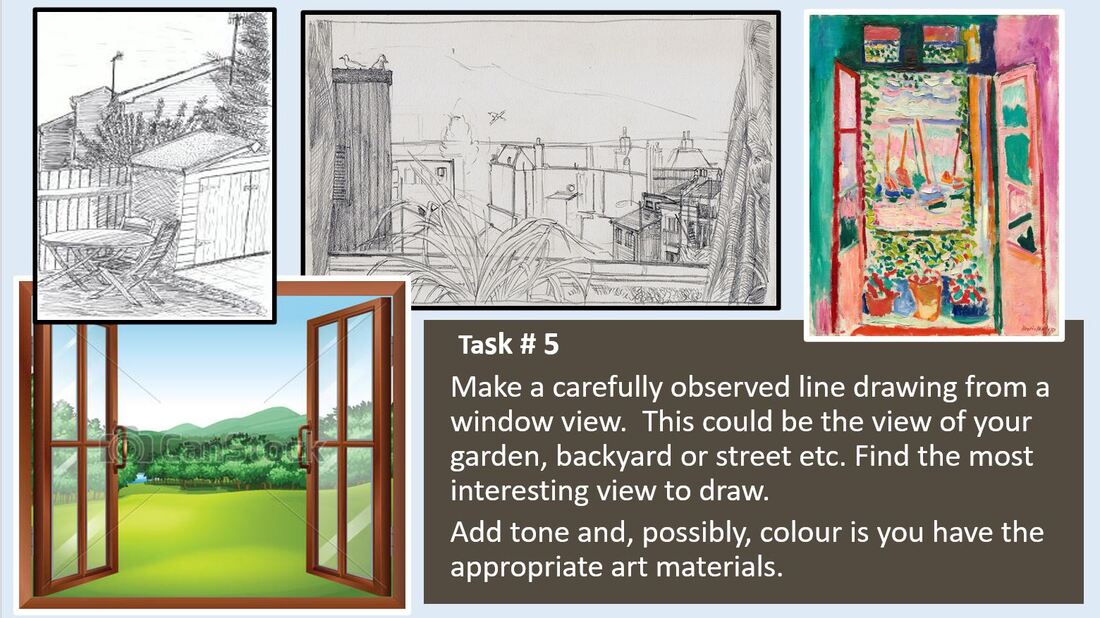
View from a Window